Ramon Hoffman

Pneumix Loader Cycle

An interactive walkthrough that shows Pneumix customers exactly what happens, step by step, when their catalyst loader runs a batch cycle.

01

The Brief

Pneumix builds dosing and injection units that add catalysts and additives to FCC (fluid catalytic cracking) units at oil refineries. Before running a cycle, an operator sets two values on the loader's HMI: the addition rate per 24 hours and the batch target per shot. Pneumix wanted a web-based walkthrough that explains what actually happens inside the machine during that cycle, step by step, mainly to show leads and potential clients how the system works without needing to stand in front of the physical unit.

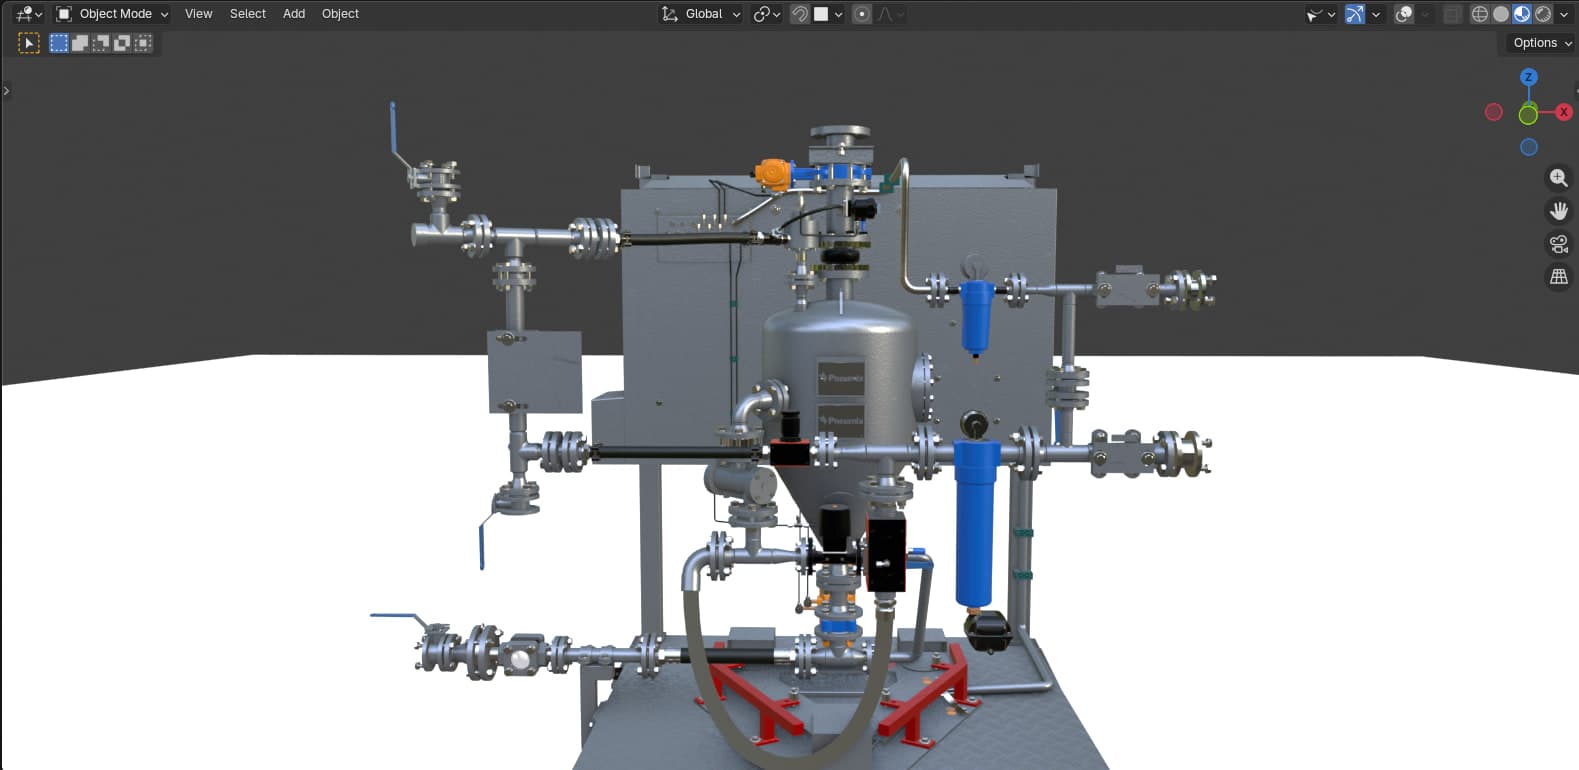
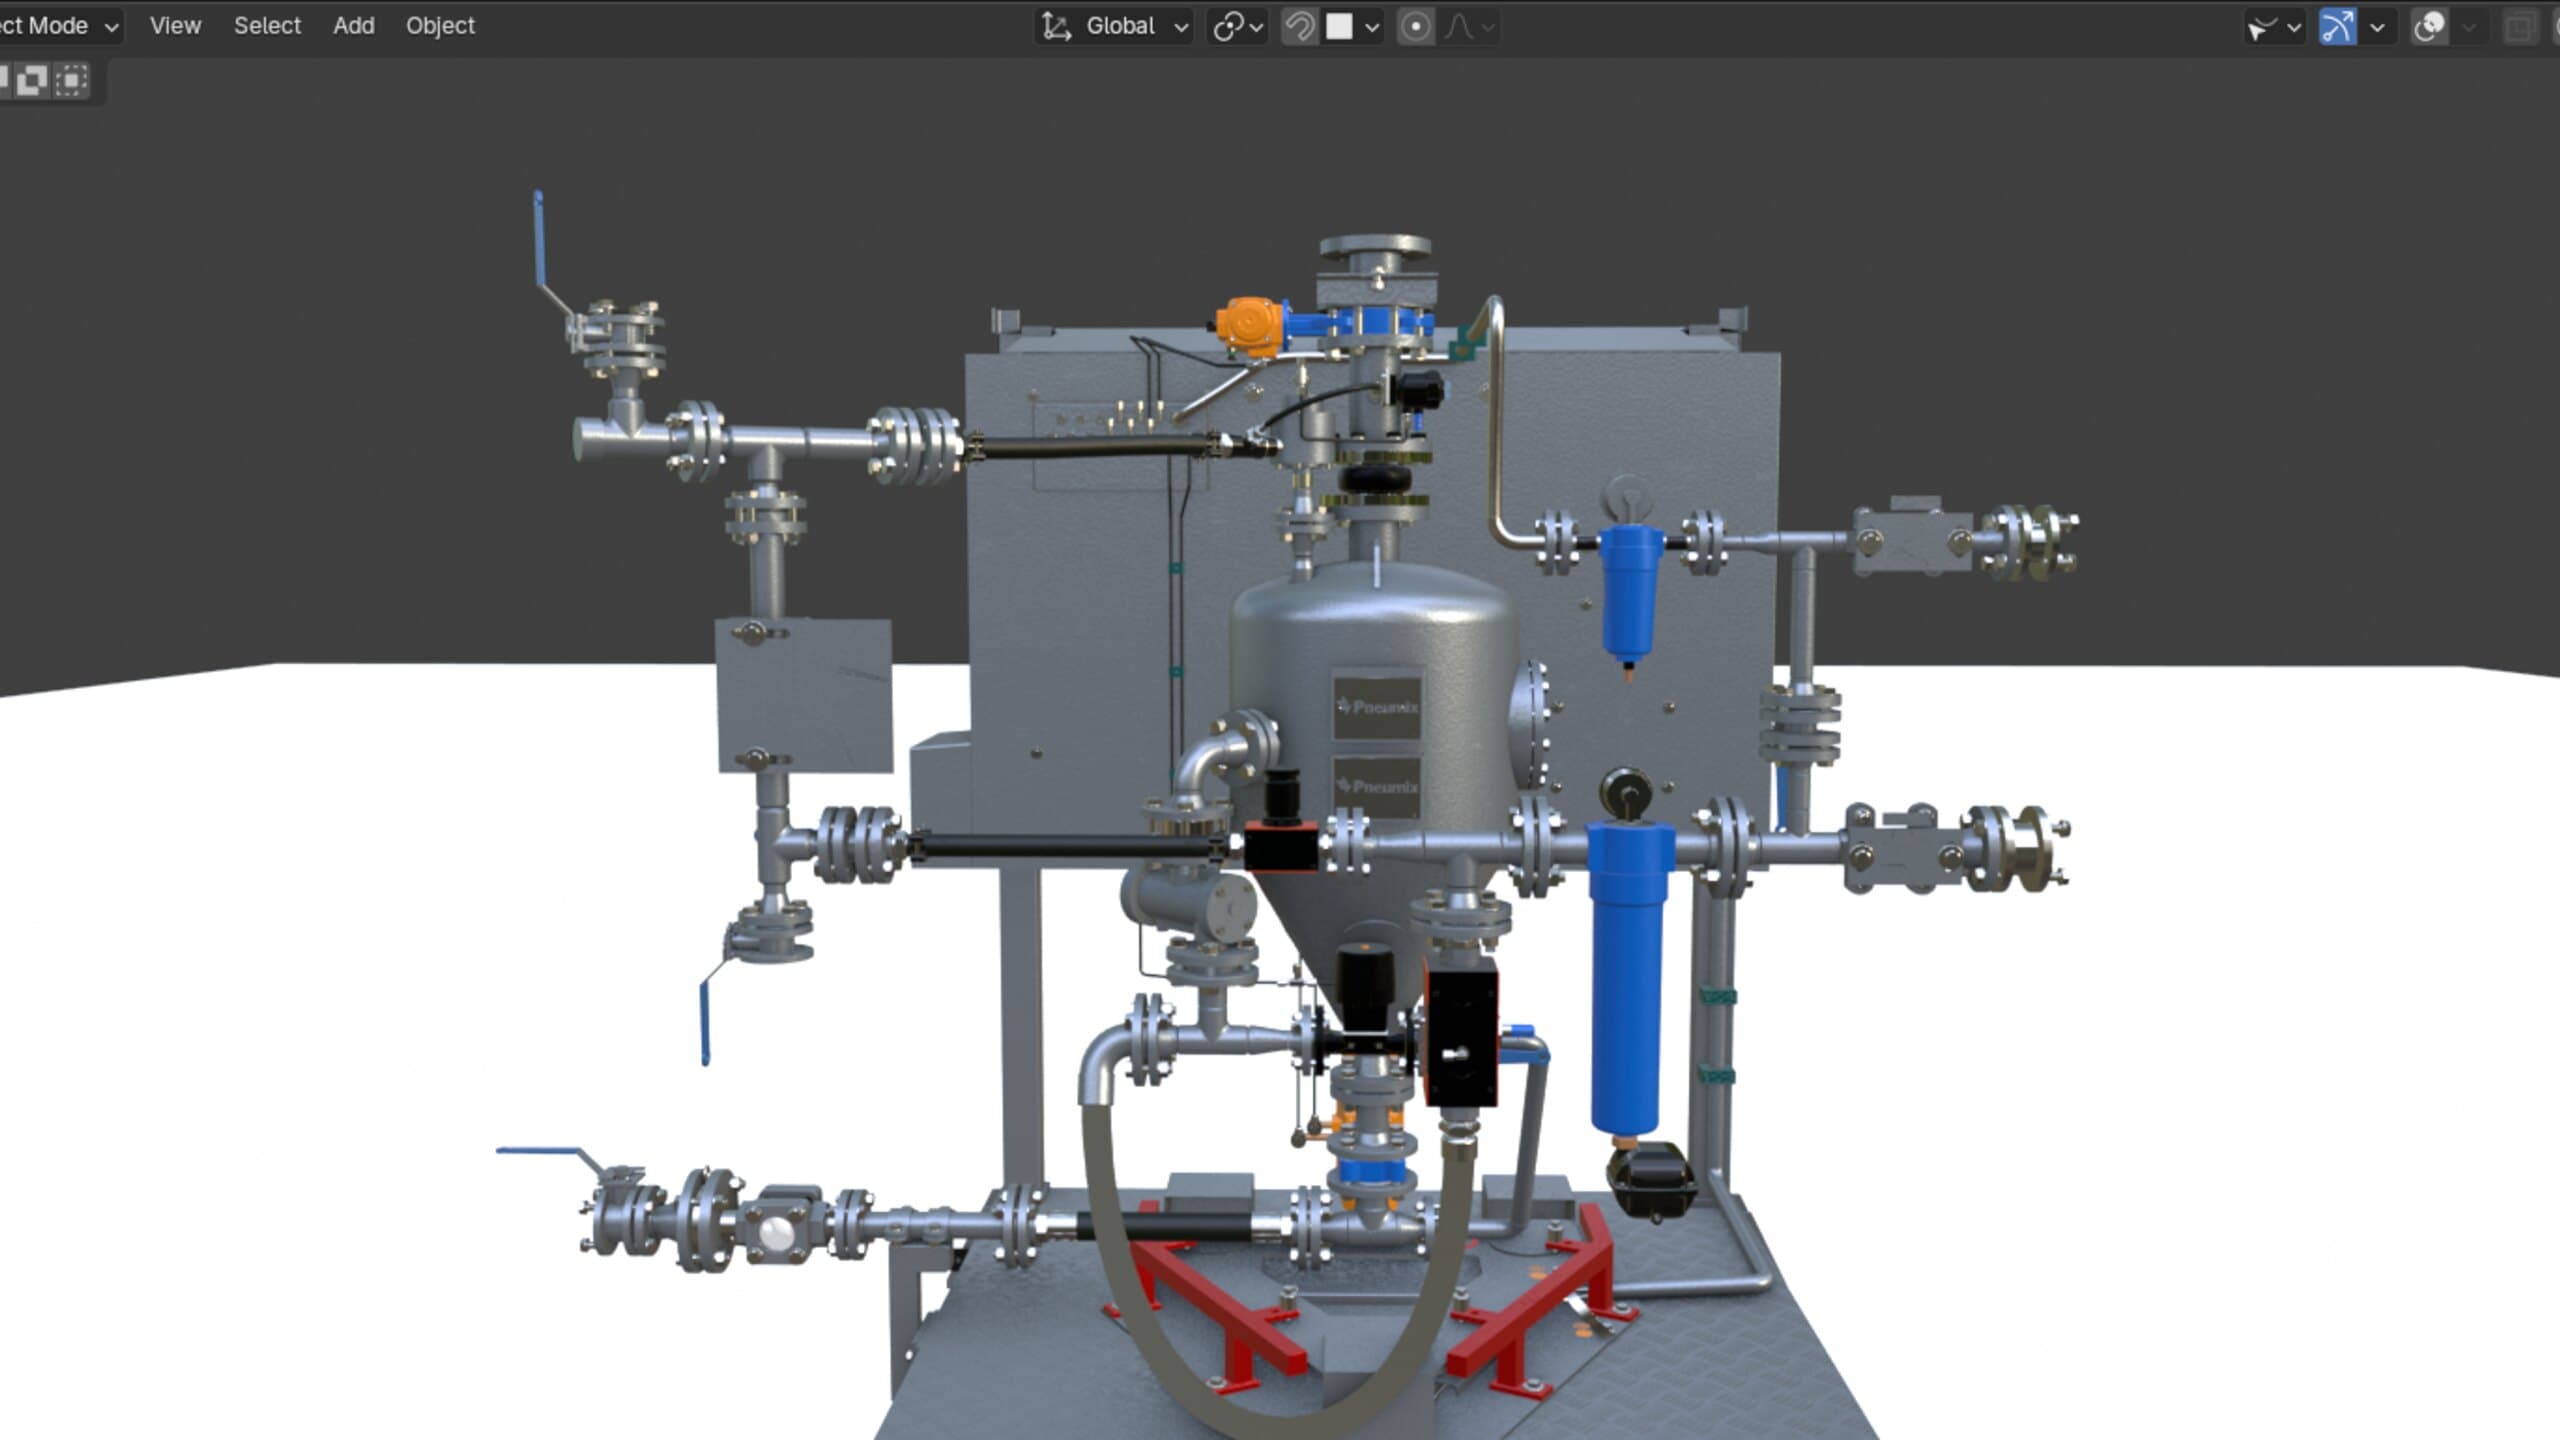
The render had to match the real machine exactly, since it would sit next to genuine Pneumix branding and be judged against the actual product. I was given the client's CAD files for the geometry, but the materials weren't usable as-is, so every surface (brushed steel, the branded housing panels, the filter housings, the rubber hosing) had to be shaded and textured again from scratch in Blender.

02

My Approach

I modeled the scene from the CAD import and built out an 11-step camera and animation sequence in Blender, one step per stage of the loader cycle. For each step I rendered two clips: a short animation showing the transition, and a looping hold of the last frame. That second clip is what keeps playing while the viewer reads or waits on that step, so the page never has to freeze or jump-cut back to the start of a loop.

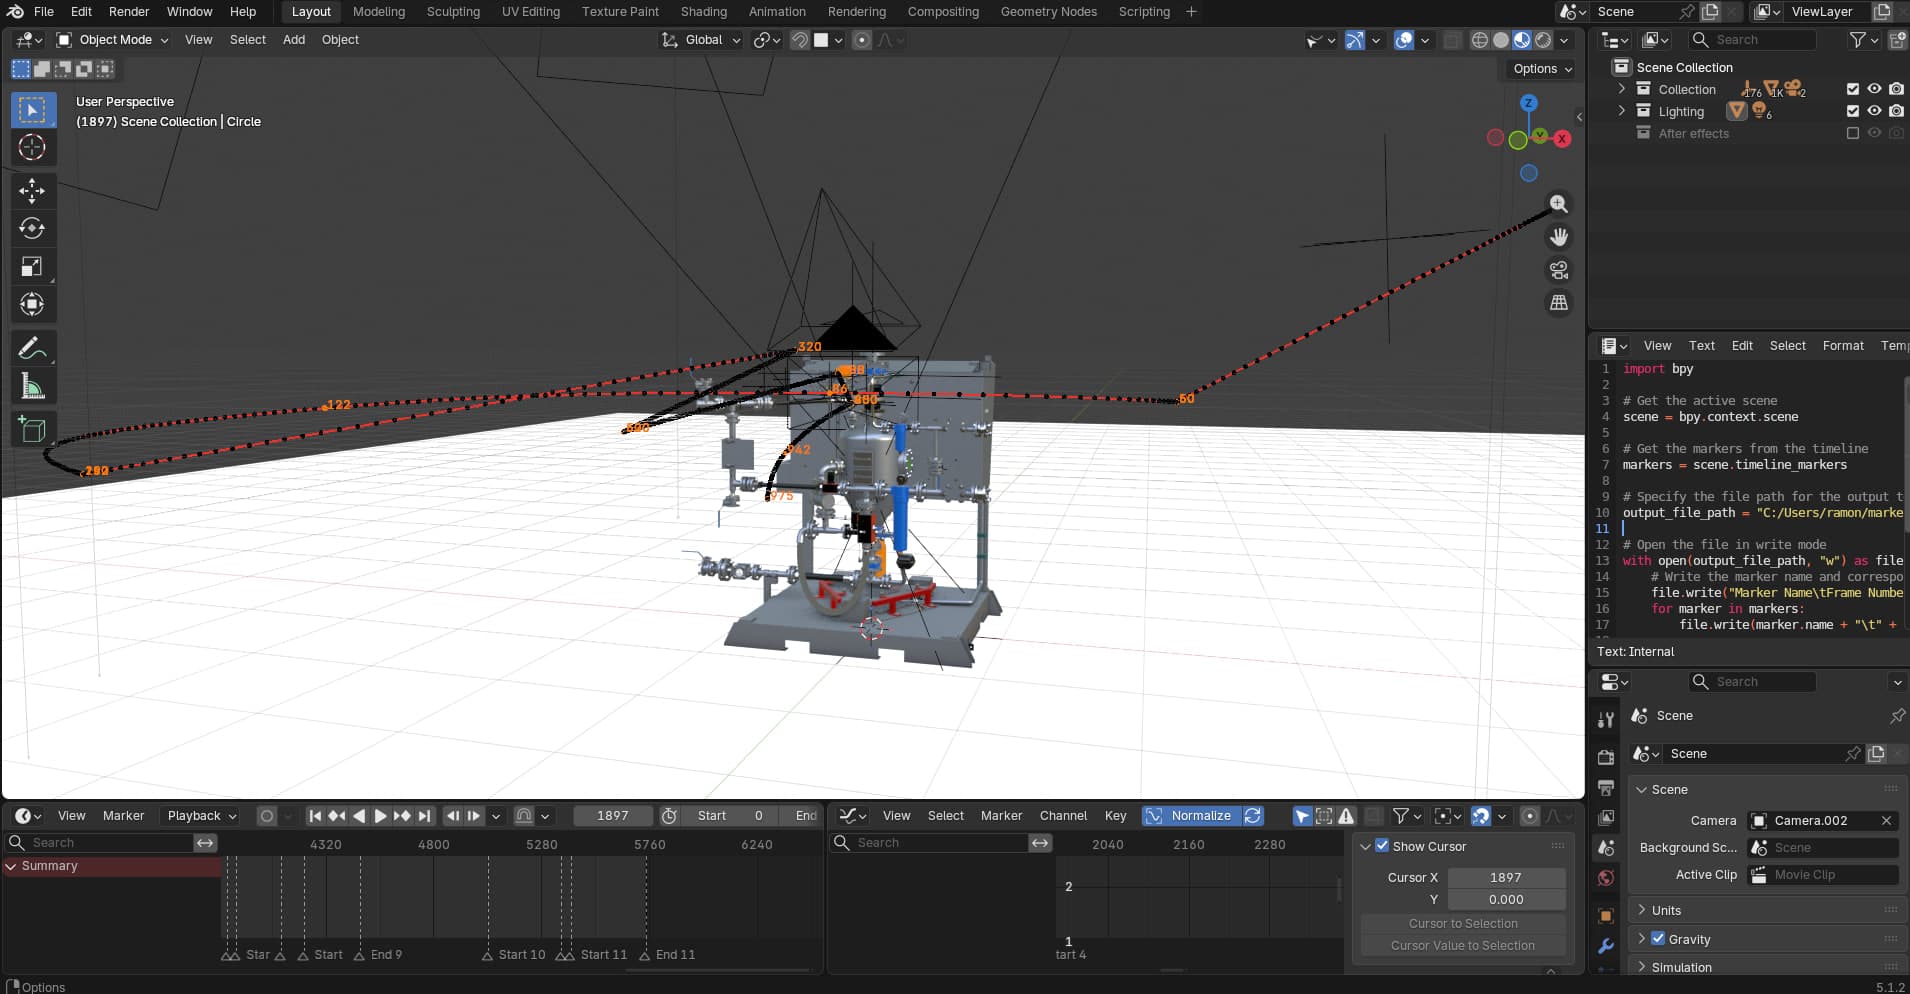
To keep the render output organized across 11 steps, I wrote a small Python script inside Blender that exports the scene's timeline markers to a file, so each clip could be matched to its step automatically instead of tracking frame ranges by hand.

The renders then went to a colleague, who added the 2D motion graphics on top in After Effects: the highlighted flow paths, arrows, and value call-outs (like the "25 kg" batch readout) that make each mechanical step easy to follow. A third colleague built the website that hosts the finished step sequence.

Behind the scenes in Blender: the camera path for one step, alongside a small Python script written to export the scene's timeline markers, part of the tooling used to split the render into per-step clips automatically.
Blender viewport of the Pneumix loader unit, rebuilt to match the client's CAD geometry with all materials shaded from scratch.

03

The Result

An 11-step interactive walkthrough of the Pneumix loader cycle, from the operator setting the addition rate and batch target on the HMI through a full batch being loaded and discharged. Each step combines a 3D render matched to the real machine with 2D motion graphics highlighting what's moving and why, and steps flow into each other without a visible cut.

04

Outcome

The tool is used internally at Pneumix, most likely to walk leads and potential clients through how the loader works. It's not publicly live. There wasn't a big technical takeaway on this one for me personally, but it was a good project to work on as a team where everyone owned one clear part: the 3D render, the 2D overlay, and the website, and it all came together as one piece.

Ramon Hoffman, Multimedia Designer / 3D Artist / Web Developer

03 / About

Concept first, medium second

I'm Ramon, a multimedia designer based in Eindhoven. Projects start with a problem: what the thing has to do, and how someone should move through it. The answer has been a 360 film, a VR walkthrough, an explainer animation, a configurator and an AI training platform.

My part is 3D, design and code: modelling and lighting in Blender, interface and motion in XD/Illustrator and After Effects, and the build in PlayCanvas or Next.js.